
How To Clean Your Motorbike: The Complete Guide (2022)

Motorbike detailing is cleaning and polishing taken to the extreme, with multiple steps and dedicated products, each of which is designed to thoroughly clean, to make each part super shiny or to protect the end result from the elements.
It removes all the bugs, salt and road grime without ruining the paintwork. The process also makes sure there are no nasty detergent residues left on it.
The Two Bucket Rule
One bucket has your warm soapy water of choice and the other simply has clean water. Some people get two labelled buckets the same so they stack and others go for different styles / colours so it's really obvious which is which.
The sponge goes into the soapy water, on to the bike to dislodge any dirt and then straight into the clean water before repeating.
By dipping it into the clean water after washing the bike all the dirt coming off ends up at the bottom of the clean water bucket, leaving your soapy bucket nice and fresh to repeat the process.
If you just use one bucket some of the dirt and particles can make their way back onto the bike and cause those annoying circular scratches you often see in bright sunlight.
To make it even easier to avoid dirt making its way back on to the bike consider using a Scratch Shield in the bottom of each bucket.
The shields are plastic mesh structures which sit at the bottom of the bucket and prevent your sponge accidentally making contact with the layer of grime that has sunk to the bottom.
Hand Washing
Bikes and scooters tend to be dirtier at the bottom, for obvious road adjacency reasons, so many people start off at the top and finish with the back wheel / swingarm.
Make sure to pay some attention to the under tail area as well, especially if a rear hugger isn't fitted, as this area can take a lot of abuse.
The top to bottom / front to back general approach keeps the washing sponge cleaner for longer and the water dripping down the bike gives you a head start with the worst grime at the bottom.
If you don't have a centre stand fitted propping up the side stand a bit to get the bike near vertical can help ensure both sides get equal attention.
It's also worth doing this job in the shade if you can because the sun can dry the wet soap before it has a chance to do its thing.
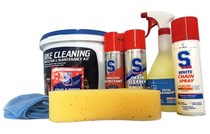
There are loads of different soaps and shampoos out there you can use, all claiming to do the best job but if you would like to know which are really the best best we recommend asking Petrolhead Detailing. They really know their stuff, use these products every day at their detailing HQ and are Gtechniq certified.
Check out this video from Motorcyclist Magazine.
Snow Foam
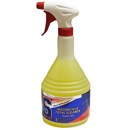
Snow foam is a relatively new way to deep clean your bike using a pressure washer and where things get serious.
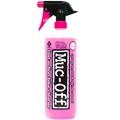
You'll need a snow foam "lance", sometimes also referred to as a foam cannon, a pressure washer to connect it to and your snow foam liquid of choice. Like standard motorbike shampoo there are loads to choose from.
The foam goes into the bottle attached to the lance, which is just a solid tube the bottle can be mounted to, then when the water is pumped through from the washer it mixes with the foam liquid and is then pushed through a fine nozzle at the end, causing it to turn into a flurry of what looks like snow.
The snow foam hits the bike and sticks to it in a thick layer which means the detergent in the foam ends up in more consistent contact with the bike's surfaces.
It's also in contact longer versus watery suds dripping off from a sponge so the cleaning action is more effective. Plugging up the exhaust with a rolled up rag is a good idea before you get started.
If you have the setup to make it snow it's the pre-wash step before the two bucket rule. Simply spray it on, let it soak for a bit and then get busy with the buckets.
Check out this video from DukeOfDC.
Sponge, Cloth Or Mitt
Should you use a cloth, sponge or wash mitt to clean your bike? Believe it or not there is a big difference and they potentially all have their place in the detailing regime.
For washing you want to be using a sponge or wash mitt for the general bike bits and perhaps specialist detailing brushes for the fiddly bits.
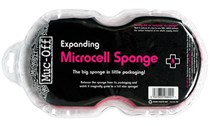
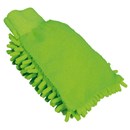
So what is a Wash Mitt? It's a big open glove which has a special cleaning surface on one face and it's generally made of something soft like micro fibre or if you're feeling fancy lambs wool.
They are more expensive than sponges but due to the fibre like structure of the material the cleaning surface has a much larger surface area with which to trap the dirt / grit currently on the bike's surface.
They are also a lot more flexible and adapt to the changing surfaces of the bike with your hand. That means more dirt goes from the bike into the second bucket, you clean it quicker and there's less chance of ruining the finish with those circular swirls in the paint work.
Try to move the mitt in straight lines rather than circles to reduce the chances even more.
Check out this video from Hotchkiss Performance.
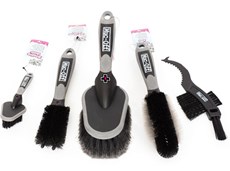
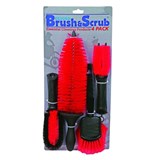
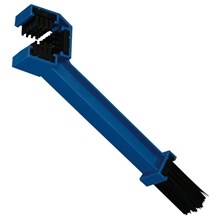
Brushes
Many bikes are covered in intricate and tricky to clean bits, even more so if they are designed to look really good or have a specific matt paint finish. Luckily there's a specific brush available for each bit!
Unlike cars bikes tend to have a cunning mixture of panels, leathers, textiles and engine parts all open to the elements and to make things worse the tricky areas are often intricate dirt traps purely to make the bike look cooler e.g. engine cooling fins or wire spoked wheels.
The Rinse
After washing your bike it's important to get all the detergent residue off so it doesn't damage the paint. It's a good idea to give it a really good rinse with clean water from a hose, watering can or pressure washer.
What Is A Pressure Washer?
It's a large tank of water or a connection to the mains water, which is then pumped at a certain rate by a mechanical or electric pump into a lance.
At the tip of the lance is usually an interchangeable nozzle which restricts the flow and shapes it in a certain way so that the pressure from the pump is massively increased. The flow is usually shaped as a wide blade or a very precise stream.
A high pressure stream of water is super effective at removing surface dirt from a bike but with too much pressure and / or if the stream is too tightly focused then it can easily strip the paint itself, bend cooling fins or destroy the delicate electronic bits!
Drying
Drying the bike properly is important because you don't want it covered in water spots and it has to be completely dry before you start polishing or applying protective coatings.
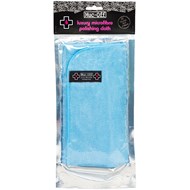
People usually start with a stack of clean microfibre clothes to get the worst off. Micro fibre is a great material because loads of tiny fibres all crammed onto the surface give the towel a massive surface area to wick up the water droplets. Buy in bulk though because you'll go through a lot!
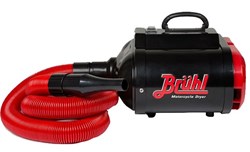
To finish the job quickly many people then go over the bike, especially the tricky cracks'n'crevices, with a bike dryer. It's basically a big hair dryer / air compressor with a long flexible hose for getting the air flow to where it's needed.
The pressure forces its way into the cracks to expel any water back out, so watch where your face is and the heat helps anything left to evaporate more quickly.
They come with different power ratings so do some thorough research before splashing any cash on one. Cheaper alternatives include old leaf blowers and even pet dryers.
It will depend on the exact bike model however the chances are there will be certain bits that collect more water and certain bits it's a good idea to start with first.
For instance the screen is generally designed to deflect wind blast around the bike so it can be a good idea to dry that bit first to avoid a cloud of fresh water covering the back of the bike after you've spent ages drying it. Individual bolts, the fuel filler cap and the radiator will also likely collect water as will the fins on air-cooled motors.
Check out this video from TheMissendenFlyer.
The Clay Bar
There's a good chance you haven't heard of clay bars and how they can help deliver a glass smooth paint finish.
It's exactly what it sounds like - a bar of soft clay and they are particularly good at removing bonded surface contaminants like sap, road film, salt, bird droppings and dust which then leaves the paint feeling glassy smooth to the touch.
You can work out which areas need it by running your fingers over the paintwork to pick up any rough feeling bits. They come in rough, medium and fine but fine is the easiest to begin with because it's less abrasive.
To use the bar first spray some clay bar lubricant on the paint or a little shampoo mixed with water, then rub a small flattened bit of the bar very gently over the rough area. Be careful not to apply any pressure though, just let the clay's surface do the work.
You'll see whatever was making the surface rough transfer onto the clay and once that side is dirty you can fold it over for another two clean surfaces to work with. If you drop the clay it's probably game over though.
An alternative to a clay bar is a Clay Mitt or Clay Cloth and you can even get special clay bar lubricants to us with them.
Check out this video from Sweet Scoots.
Polishing And Waxing
Polish is usually a liquid but wax can be bought in traditional solid form or more modern liquid form (shake well). The liquid variety is usually synthetic and tends to be applied with foam applicator pads then wiped off with a handful of microfibre cloths.
First polish to buff out any really minor imperfections in the paint layer with liquid polish and a microfiber cloth. Once you've achieved a perfect finish you need to add a layer of cheaper wax on top to protect that perfect finish from the environment.
Note that many modern bikes and scooters, particularly in black, have a mix of gloss and matt paint finishes to create what we like to call "The Batman Effect" so take care to only polish the shiny bits!
Check out this video from TwoWheelObsession.
Protection
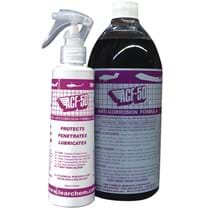
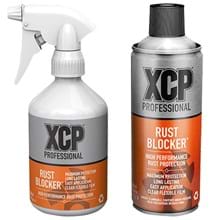
Protecting your perfect finish on the painted bits is easy enough but what about the engine and drive chain? That's where products like ACF-50 and XCP come in.
ACF-50 is short for Active Thin Fluid Film Chemistry. It's a bit like a premium aircraft grade WD-40 when used as an anti-corrosion spray and binds to the surface of the material being protected, but like WD-40 it literally gets everywhere so plan well ahead or have some fine art brushes handy!
It isn't that cheap but over the long term it may well save you some pounds replacing rusted parts and should help to keep the value of the bike on the used market. XCP is another brand worth using.
The spray (or the spray used as a paint with a brush) is best applied to a really clean bike before Winter to add a base layer of protection from salt and grime and it should last a good six months after application, however it really is a base layer and should be applied to a bike's non-contact surfaces once it's completely clean.
The engine is a good contender but watch out for a little bit of smoke post-coat as some of the oil based ACF-50 coating vaporises with the heat.
Check out this video from BikeSocial.
Specialist Protection
So what's the ultimate level of detailing you can do? Believe it or not there are specialised products out there for the screen, seat, wheels, Chrome bits and more.
Gtechniq are market leaders but check with an expert like the guys at Petrolhead Detailing if you want to dive further into this area.
Chain Maintenance
An average bike engine generates as much power as a family car yet lays it down on the tarmac with half the wheel count. The chain delivers all that power so it's important to look after it.
Once the whole bike has been cleaned and dried it's time to lube the chain again. Popping the bike on a rear paddock stand really helps because the wheel and chain can be moved easily by hand.
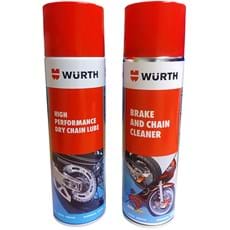
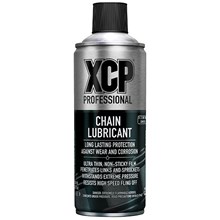
Apply your chain lube of choice then hold an old duster / rag against both axes of the chain and run it all the way through to wipe off any excess. If there is too much it will just spray all over the rear of the bike.
If you are lubing the chain without a full clean of the bike as well then use some Kerosene (Paraffin / WD-40) and a stiff hand brush applied to the bottom / top / sides of the chain while it's fully rotated to give a good clean first.
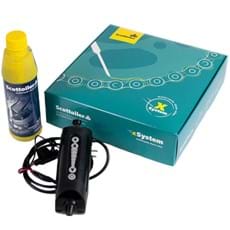
Alternatively you could invest in something like a Scottoiler system to automatically keep the chain lubricated and it's one less thing to think about.